by Lars Aronsson, September 2005
Digital cameras with resolutions of several megapixels are becoming a viable alternative to scanners for capturing printed book pages. This is actually far from obvious. Let's look at the challenges and how they can be overcome.
This text is still work in progress. Many questions remain. A good forum for discussions is the Bookpeople mailing list. Please send feedback to the editors@runeberg.org
Digital camera challenges:
|
Digital camera advantages:
|
Normal flatbed scanners for A4/letter size papers have become extremely cheap during the 1990s. They are now sold for less than 100 euro or dollars, but in 1990 they could be ten or fifteen times more expensive. On their surface of 210 x 297 mm or 8.5 x 11 inches, a scanning resolution of 600 dpi (dots per inch) will give you an image with 34 megapixels. Some claim that 300 dpi is enough for book scanning, but that is still an 8 megapixel image. In comparison, the affordable class of digital cameras reached 2 megapixels in the year 2000 and cost 600 dollars at the time. Five years later a 6 megapixel camera costs 300 euro or dollars. This looks promising for the future. We can already expect more people to own high resolution digital cameras than scanners. A very useful website for reviews of digital cameras is dpreview.com.
Book pages are captured for several reasons: For human eye reading on screen, for printing, and for optical character recognition (OCR). All uses have favored high-contrast or bitonal scanning in high resolutions. Project Runeberg has been using 600 dpi bitonal TIFF G4 as a standard format since 1998. Digital cameras on the other hand almost exclusively produce color JPEG images. Traditional OCR programs want a scanned image where the text lines and columns are straight, and where the text stands out in high contrast against an even background. Achieving optimal results with a scanner is far more easy than with a camera, whether by pressing the book flat against the scanner glass or by cutting the spine off the book and pushing the loose pages through an automatic document feeder. Getting good and even lighting and keeping the paper surface flat are two major challenges with camera photography of books.
Released in September 2005, version 8 of the ABBYY FineReader OCR software features support for "Digital Camera OCR".
Cameras can capture books in a non-destructive way, which makes this method optimal for reference books at the library that you aren't allowed to take home. But if good photography requires a stand and lamps, will you be allowed to bring that equipment to the library? Here is a challenge to design an easily transportable set that still gives good images.
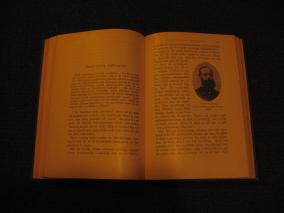
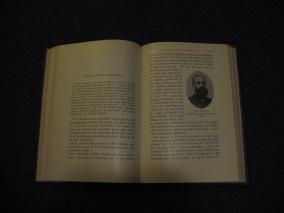
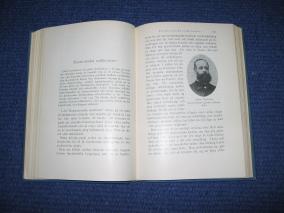
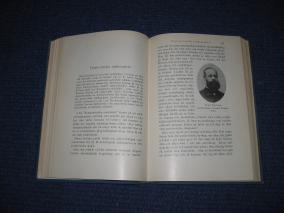
Let's first look at the effect of really poor lighting. A book was placed on the floor in a room with no daylight, having a single 60 Watt lightbulb lamp in the ceiling. Lightbulbs have a yellowish or "warm" light, something the human eye tends to forget. This digital camera has a setting for white balance, that can adjust for the warmness of the light. In the example to the left, this was set to normal outdoor photography. In the example to the right, the lightbulb setting was used. Both examples show the photographer's shadow near the bottom of the book. This book's high glare paper reflects some of the light where the paper curves. Good lighting comes from the sides, but this light comes from straight above.
| White balance set for sunlight:
|
White balance set for lightbulb:
|
One tempting solution is to use the camera's built-in flash. This has the drawback of coming from the camera and not from the sides, so there is a high risk for reflexions. To some degree, this can be reduced by covering the flash with a semitransparent paper, as the example to the right shows. Full resolution details are shown below.
|
|
A better alternative would be to use a separate light from the side. How is this best arranged?
The two photos below were both taken with a Nikon D200 using an aperture of f/8.0 in less than perfect light. The difference is the focal length of the lens. With the 50 mm lens, the camera needs to be close to the book and the three-dimensional perspective is skewed. At the top and bottom, the book's back cover is shadowed by the page in view. But with the 100 mm lens (at twice the distance from the book), the edges of the back cover can be seen at the top and bottom.
This page is from Nordisk familjebok, 2nd ed. (1907), volume 6, columns 449-450.
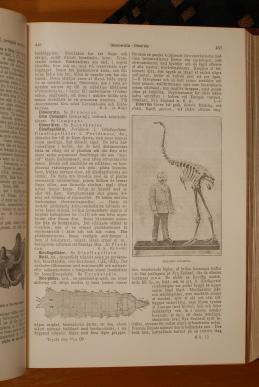
50 mm lens - bad |
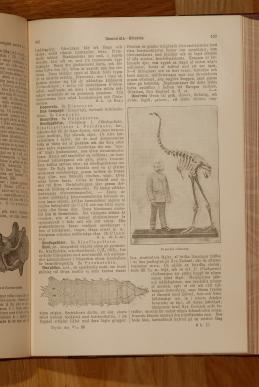
100 mm lens - good |
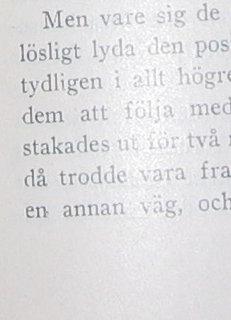
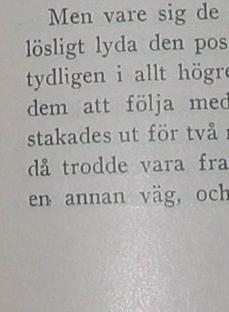
The two photos below were both taken with a Nikon D200 using a 100 mm lens and less than perfect light. The difference is the aperture and the resulting depth of field. While aperture f/2.8 only requires 1/8 seconds of exposure even in this poor lighting, the depth of field gets so short, that text curving down towards the spine gets fuzzy. In this poor lighting, aperture f/8.0 requires a whole second of exposure, but the depth of field is larger, making all text sharp.
As far as possible, pages should be kept flat in order not to distort the text, perhaps best by placing a V-shaped glass on top of the open book, but this example still shows how depth of field can be an important factor in deciding which aperture to use.
This page is from Nordisk familjebok, 2nd ed. (1907), volume 6, columns 1221-1222.

f/2.8 - bad |

f/8.0 - good |
You can read more in Wikipedia about the photographic lens and its focal length, aperture and depth of field.
Holding the camera with your own hands is useless, except for a few pages. You will get tired. The distance and direction will not be exactly the same for each page, making the pages jump around when you flip through the book. If you don't use the flash, you will need long shutter times, and the photo will be ruined if your hands shake a little. Your hands will be occupied when you need to turn to the next page. What you want is a copy stand (google for images) that holds your camera as well as lamps on both sides. Copy stands are available from 100 dollars or euro and up.
If you are on a low budget or need an easily portable unit, you can build a simple copy stand for less than 30 dollars from a quick change bar clamp (24 inches or 600 mm), as the photos in these two articles show. These articles appeared in issues No 66 (October 2004, page 10) and 67 (December 2004, page 40) of Diskulogen, journal for the Computer Genealogy Society of Sweden (DIS).
Which cameras can be operated remotely? Should they be directly connected to a laptop computer?
| English | Swedish | German |
|---|---|---|
| (quick change, quick ratcheting, one handed) bar clamp | (snabb-, enhands-) tving | (Schnell-, Einhand-) Zwinge f. |
| copy stand | reprostativ | Reprostativ n. |
| lens | objektiv | Objektiv n. |
| focal length | brännvidd | Brennweite f. |
| aperture | bländare | Blende f. |
| depth of field | skärpedjup | Schärfentiefe f. |